Introduction
This article contains all the information you might need on using Azure SQL databases through Entity Framework from within an App Service with managed service identities (MSI) configured (where the MSI is used to authenticate with the Azure SQL database) all set-up using Azure Pipelines CI/CD. There is some information out there on all the different parts but it turns out that a lot of investigation was needed to get everything working together smoothly.
The basics
Read the tutorial created by Microsoft, to see what it takes to do most of what we want manually , here:
Tutorial: Secure Azure SQL Database connection from App Service using a managed identity
This is what we want to perform automatically in the deployment pipeline. There are also some other tweaks you might need in your situation and these are described at the end. Anyway, we are going to show the following parts:
- Configure Azure SQL via an ARM template.
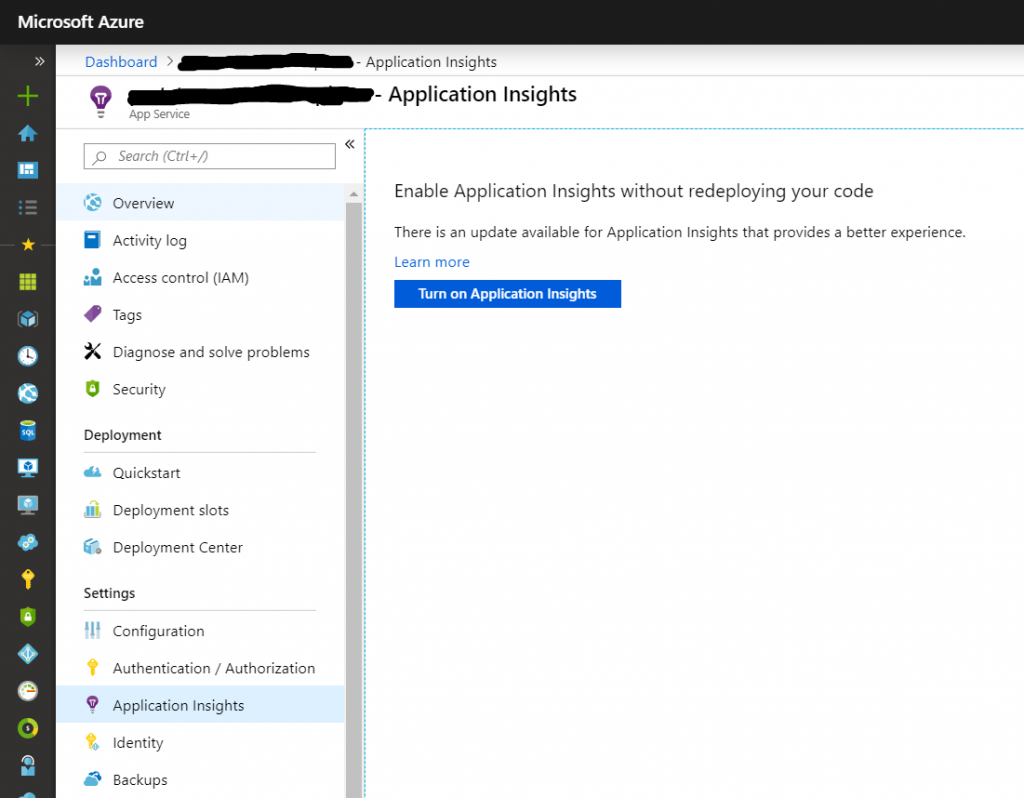
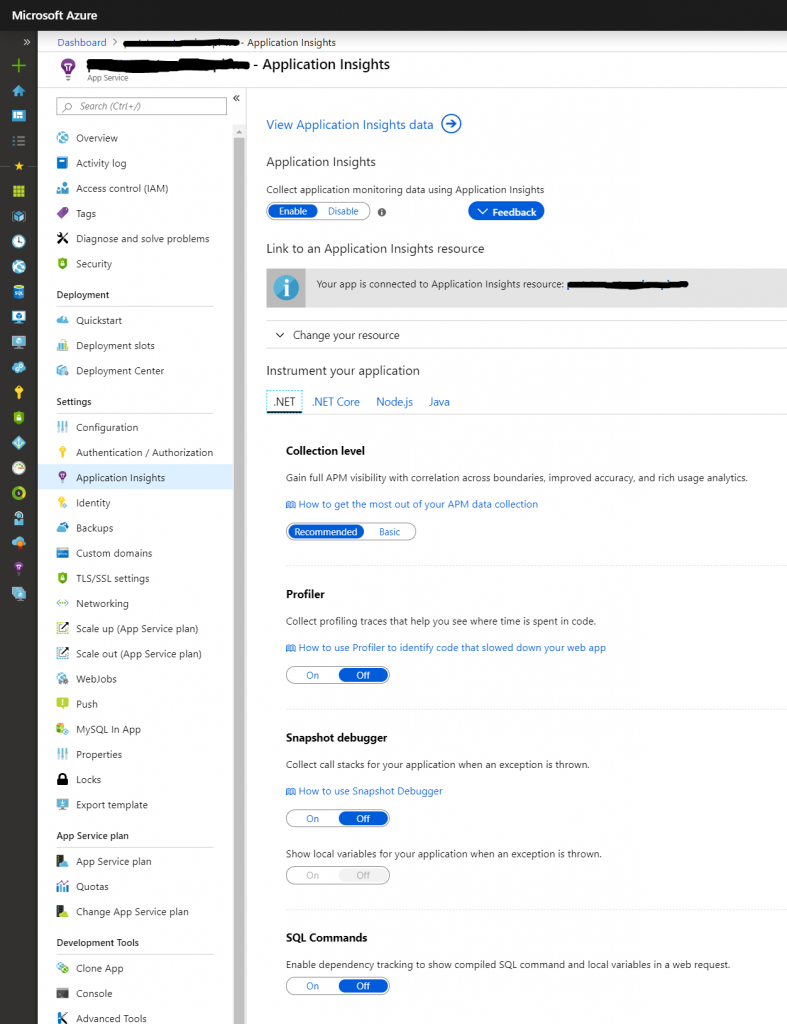
- Configure an App Service with a managed service identity (MSI).
- Add the MSI as a user to the database.
- Use the MSI to connect to the database.
- Further tips.
We will assume you have a basic understanding of ARM templates and Azure DevOps YAML pipelines throughout this article.
Configure Azure SQL via an ARM template
You can find the ARM template reference for SQL Servers and SQL Databases here.
We will split up the ARM snippet into a few separate snippets. One for creating the server and two snippets for creating inner resources (a database and an AAD administrator configuration).
SQL Server
The server snippet creates the server and configures a regular administrative login. A regular administrator login is still mandatory (and this is not an AAD login). It is probably best to generate your SQL Admin password during your deployment and write it to a key vault for safekeeping. We will use this account later on when adding our AAD accounts as users to the database.
{
    "type": "Microsoft.Sql/servers",
    "kind": "v12.0",
    "name": "[parameters('SqlServerName')]",
    "apiVersion": "2019-06-01-preview",
    "location": "[resourceGroup().location]",
    "properties": {
        "administratorLogin": "[parameters('SqlServerAdminName')]",
        "administratorLoginPassword": "[parameters('SqlServerAdminPassword')]",
        "minimalTlsVersion": "1.2",
        "version": "12.0"
    },
    "resources": [
        // inner resources go here (also remove this comment).
    ]
}
Database
The following creates a database using the old style DTU based resource configuration.
{
    "type": "databases",
    "name": "[parameters('SqlDatabaseName')]",
    "location": "[resourceGroup().location]",
    "apiVersion": "2014-04-01",
    "dependsOn": [
        "[resourceId('Microsoft.Sql/servers', parameters('SqlServerName'))]"
    ],
    "properties": {
        "collation": "[parameters('SqlDatabaseCollation')]",
        "edition": "[parameters('SqlDatabaseEdition')]",
        "requestedServiceObjectiveName": "[parameters('SqlDatabaseServiceObjective')]"
    }
}
Note: the API version is set to a relatively old one. Using the newest one has a different syntax and by default creates vCore based databases.
ARM based AAD administrator
Though not strictly necessary for adding AAD accounts later on at the database level, you can add one AAD account as server administrator via the ARM template with the following resource:
{
    "type": "administrators",
    "name": "activeDirectory",
    "apiVersion": "2019-06-01-preview",
    "location": "[resourceGroup().location]",
    "properties": {
        "administratorType": "ActiveDirectory",
        "login": "[parameters('AADAdminLogin')]",
        "sid": "[parameters('AADAdminSid')]",
        "tenantId": "[parameters('AADAdminTenantId')]"
    },
    "dependsOn": [
        "[concat('Microsoft.Sql/servers/', parameters('SqlServerName'))]"
    ]
}
Configure an App Service with a managed service identity (MSI).
Now that our database is all in order it is time to configure our App Service with an MSI in its ARM template:
{
    "apiVersion": "2015-08-01",
    "name": "[parameters('WebAppName')]",
    "type": "Microsoft.Web/sites",
    "location": "[resourceGroup().location]",
    "identity": {
        "type": "SystemAssigned"
    }
    ...
}
We will need some information regarding the MSI created for our web application in our deployment pipeline so we will also add the following ARM output parameters:
"outputs": {
    "ManagedServiceIdentityPrincipalId": {
        "type": "string",
        "value": "[reference(concat(resourceId('Microsoft.Web/sites', variables('webAppName')), '/providers/Microsoft.ManagedIdentity/Identities/default'), '2018-11-30').principalId]"
    },
    "ManagedServiceIdentityClientId": {
        "type": "string",
        "value": "[reference(concat(resourceId('Microsoft.Web/sites', variables('webAppName')), '/providers/Microsoft.ManagedIdentity/Identities/default'), '2018-11-30').clientId]"
    }
}
NOTE: Another way to reference this info is described here but I have not tried it myself.
With your ARM template updated, if you didn’t have any output parameters before, you might need to add some tasks to your pipeline. We are using YAML, and the following steps would take care of ARM template deployment and retrieval of the output parameters afterwards:
- task: AzureResourceGroupDeployment@2
  displayName: 'Deploy ARM template'
  inputs:
    azureSubscription: 'Your service connection name here'
    resourceGroupName: '$(resourceGroupName)'
    location: '$(location)'
    csmFile: 'ARMTemplate.json'
    csmParametersFile: 'ARMTemplate.parameters.json'

- task: keesschollaart.arm-outputs.arm-outputs.ARM Outputs@5
  displayName: 'Retrieve ARM Outputs'
  inputs:
    ConnectedServiceNameARM: 'Your service connection name here'
    resourceGroupName: $(resourceGroupName)
NOTE: The
keesschollaart.arm-outputs.arm-outputs.ARM Outputs@5task is found in this extension.
Add the MSI as a user to the database
Now comes the tricky part, actually giving the MSI access to the database. According to the original tutorial we would need to execute the following piece of SQL to add the user (where <identity-name> is the name of the web application, since system assigned MSIs have the same name as their parent web application):
CREATE USER [<identity-name>] FROM EXTERNAL PROVIDER;
ALTER ROLE db_datareader ADD MEMBER [<identity-name>];
ALTER ROLE db_datawriter ADD MEMBER [<identity-name>];
ALTER ROLE db_ddladmin ADD MEMBER [<identity-name>];
GO
If you were to try to perform this in the pipeline with a SQLCMD operation using the server admin username and password configured in the SQL Server creation step, you would find out there is a sneaky caveat here. You can only add AAD users with this syntax if you are actually logged in to the database with an AAD user yourself. You could only accomplish this if you had made the Azure Pipelines service connection’s service principal the AAD administrator of the SQL Server in the first step. And then somehow access its client ID and secret and supply this to SQLCMD (if that would actually work, I haven’t tried). We need another way, and I wasn’t the first to think so, someone already asked here:
Is there any way to add managed identity as db user from pipelines?
So our SQL script will now read:
CREATE USER [<identity-name>] WITH default_schema=[dbo], SID=<SID>, TYPE=E;
ALTER ROLE db_datareader ADD MEMBER [<identity-name>];
ALTER ROLE db_datawriter ADD MEMBER [<identity-name>];
ALTER ROLE db_ddladmin ADD MEMBER [<identity-name>];
GO
However, we still need to retrieve the SID for the AAD user somewhere. Something you will not find in the MSI object created by the ARM template. You will also not find it in the service principal properties page in your AAD (the MSI is just a glorified service principal with an application registration). The link provided in the Microsoft Docs github issue above comes to the rescue:
Can’t Create Azure SQL Database Users Mapped to Azure AD Identities using Service Principal
[guid]$guid = [System.Guid]::Parse($objectId)
foreach ($byte in $guid.ToByteArray())
{
    $byteGuid += [System.String]::Format("{0:X2}", $byte)
}
return "0x" + $byteGuid
Though the above powershell script will work to create a correct SID for AAD users and AAD groups object IDs. If you perform this on the object ID of a MSI (the ManagedServiceIdentityPrincipalId returned by the ARM template) your user will be created, but the MSI won’t actually have access. For service principals like the MSI, the SID needs to be created from the application ID (the ManagedServiceIdentityClientId returned by the ARM template).
When putting this all together in a nice little YAML template for reuse:
parameters:
  armServiceConnection: ''  # The Azure Service Connection that has access to the specified database.
  serverName: ''            # The SQL Server name
  databaseName: ''          # The SQL Database name
  sqlAdminUsername: ''      # A SQL user with permissions to create new users.
  sqlAdminPassword: ''      # Password of the SQL user.
  identityName: ''          # The name of the user to create in the database.
  identityObjectId: ''      # The Object ID of the AAD user or group to add (or the application ID of a service principal).
  isGroup: false            # Indicates if the Object ID references a group instead of a user or service principal.

steps:
- task: PowerShell@2
  displayName: Convert ObjectID into SID
  inputs:
    targetType: 'inline'
    script: |
      [guid]$guid = [System.Guid]::Parse("${{ parameters.identityObjectId }}")
      $byteGuid = "0x"
      foreach ($byte in $guid.ToByteArray())
      {
          $byteGuid += [System.String]::Format("{0:X2}", $byte)
      }
      Write-Host "##vso[task.setvariable variable=identitySid]$byteGuid"

- task: PowerShell@2
  displayName: Create identity type
  inputs:
    targetType: 'inline'
    script: |
      if("${{ parameters.isGroup }}" -eq "true")
      {
        Write-Host "##vso[task.setvariable variable=identityType]X"
      } else {
        Write-Host "##vso[task.setvariable variable=identityType]E"
      }

- task: geeklearningio.gl-vsts-tasks-azure.execute-sql-task.ExecuteSql@1
  displayName: 'Add identity to SQL database users'
  inputs:
    ConnectedServiceName: ${{ parameters.armServiceConnection }}
    ScriptType: InlineScript
    Variables: |
      identityName=${{ parameters.identityName }}
      identitySid=$(identitySid)
      identityType=$(identityType)
    InlineScript: |
      IF NOT EXISTS (
          SELECT  [name]
          FROM    sys.database_principals
          WHERE   [name] = '$(identityName)'
      )
      BEGIN
        CREATE USER [$(identityName)] WITH default_schema=[dbo], SID=$(identitySid), TYPE=$(identityType);
        ALTER ROLE db_datareader ADD MEMBER [$(identityName)];
        ALTER ROLE db_datawriter ADD MEMBER [$(identityName)];
        ALTER ROLE db_ddladmin ADD MEMBER [$(identityName)];
      END
      GO
    ServerName: ${{ parameters.serverName }}
    DatabaseName: ${{ parameters.databaseName }}
    SqlUsername: ${{ parameters.sqlAdminUsername }}
    SqlPassword: ${{ parameters.sqlAdminPassword }}
NOTE: The
geeklearningio.gl-vsts-tasks-azure.execute-sql-task.ExecuteSql@1task is found in this extension. It has the ability to add a firewall rule for the build agent before performing any SQL operations, and removing this firewall rule after the SQL operations are completed.
The template can now be called as follows:
- template: add-aad-user-to-sql.v1.yml@templates # this is what I called my template.
  parameters:
    armServiceConnection: 'Your service connection name here'
    serverName: your-sql-server-name.database.windows.net
    databaseName: YourDatabaseName
    sqlAdminUsername: $(SqlServerAdminUsername)
    sqlAdminPassword: $(SqlServerAdminPassword)
    identityName: your-web-app-name
    identityObjectId: $(ManagedServiceIdentityClientId)
Use the MSI to connect to the database
This is actually not that different from the original tutorial. I’ve been implementing all this stuff in a ASP.NET Core 3.1 application so the steps are basically this:
- First install the
Microsoft.Azure.Services.AppAuthenticationpackage into the project containing your DBContext implementation (the last version as of this writing is 1.5.0). - Now change your DBContext implementation’s constructor and set the database connection’s token property with one retrieved for the MSI:
using Microsoft.Data.SqlClient;
using Microsoft.EntityFrameworkCore;
using Microsoft.Azure.Services.AppAuthentication;
using Microsoft.EntityFrameworkCore.SqlServer.Infrastructure.Internal;

namespace Your.Namespace.Here
{
    public class YourDBContext : DbContext
    {
        public YourDBContext(DbContextOptions<YourDBContext> options)
            : base(options)
        {
            // You might want to skip retrieving the access token in case you are running against a local DB or perhaps a sqlite DB for unit testing.
            if (Database.IsSqlServer() && !options.GetExtension<SqlServerOptionsExtension>().ConnectionString.Contains("(localdb)"))
            {
                var conn = (SqlConnection)Database.GetDbConnection();
                conn.AccessToken = (new AzureServiceTokenProvider())
                    .GetAccessTokenAsync("https://database.windows.net/").Result;
            }
        }
    }
}
- Use the following connection string
Server=tcp:your-sql-server-name.database.windows.net,1433;Database=YourDatabaseName;
You might have noticed in the code snippet above that it uses Microsoft.Data.SqlClient, it is the successor to the System.Data.SqlClient you might be more familiar with. For more information see this:
Introducing the new Microsoft.Data.SqlClient
Further tips
MSI for App Service slots
Managed service identities can also be enabled for deployment slots of your app service. In ARM templates you can add a similar identity property:
{
    "apiVersion": "2015-08-01",
    "name": "[parameters('webAppName')]",
    "type": "Microsoft.Web/sites",
    "location": "[resourceGroup().location]",
    "identity": {
        "type": "SystemAssigned"
    },
    ...
    "resources": [
        {
            "apiVersion": "2015-08-01",
            "name": "staging",
            "type": "slots",
            "location": "[resourceGroup().location]",
            "dependsOn": [
                "[resourceId('Microsoft.Web/Sites', parameters('webAppName'))]"
            ],
            "identity": {
                "type": "SystemAssigned"
            }
            ...
        }
    ]
}
The actual MSI that is created will be different from the root app service resource so don’t forget to add the corresponding output parameters as well:
"outputs": {
    "StagingMsiPrincipalId": {
        "type": "string",
        "value": "[reference(concat(resourceId('Microsoft.Web/sites/slots', variables('webAppName'), 'staging'), '/providers/Microsoft.ManagedIdentity/Identities/default'), '2018-11-30').principalId]"
    },
    "StagingMsiClientId": {
        "type": "string",
        "value": "[reference(concat(resourceId('Microsoft.Web/sites/slots', variables('webAppName'), 'staging'), '/providers/Microsoft.ManagedIdentity/Identities/default'), '2018-11-30').clientId]"
    }
}
Separate EF Migration script generation
If you use Entity Framework and don’t want to have your deployed application upgrade your DB during start-up, you will have to generate upgrade scripts in your pipeline. How to do this I’ll discuss in another article. But since the pipeline isn’t running as an active directory user with access to the database, your migration script generation will most likely fail. You will need to change the way the DBContext is created at design time from the regular context creation. Basic info on this can be found here:
Design-time DbContext Creation
As an example that makes use of the if statement created in the DBContext constructor implementation above. Here we use a very specific connection string for design time purposes (like generating migration scripts):
public class YourDBContextFactory : IDesignTimeDbContextFactory<YourDBContext>
{
    public YourDBContext CreateDbContext(string[] args)
    {
        var builder = new SqlConnectionStringBuilder();
        builder.DataSource = "(localdb)\\mssqllocaldb";
        builder.InitialCatalog = "TestDB";

        var optionsBuilder = new DbContextOptionsBuilder<YourDBContext>();
        optionsBuilder.UseSqlServer(builder.ConnectionString));

        return new YourDBContext(optionsBuilder.Options);
    }
}
NOTE: I actually don’t know why during migration script generation the database is contacted (scripts are generated for all migrations available, not just the ones needed by the database configured).